How To Take Horse Pictures - Page 2 of 2
This page continues with techniques to use when taking horse pictures. There's a big difference between a so-so snapshot and a really pleasing image of your horse.
You are on page two. This page includes:
- The Light Should Be Right
- Golden Hour
- No Clutter
- Get Eye Level
- Focus On The Eyes
- Don't Hesitate
- Use The "Secret" Everyone Knows
- Digital Camera Software: The Two "Biggees" Of Editing Photos
Find more great tips for taking horse pictures on page one.
The Light Should Be Right
Photography is the art of capturing light to create an image. Without light, there are no photographs. Without the right light, it is much, much more difficult, or sometimes impossible, to capture attractive, pleasing photographs.
- Try to capture your photos during times with lots of soft light.
- Soft light helps enrich the colors in your photos. It also reduces or eliminates harsh shadows and blown-out highlights.
- Soft light is often the result of sunshine diffused with high or thin clouds.
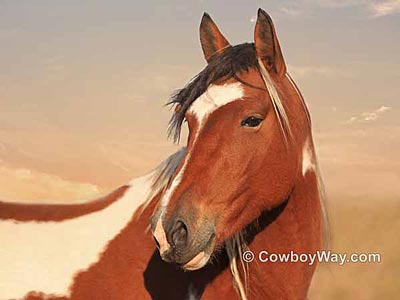
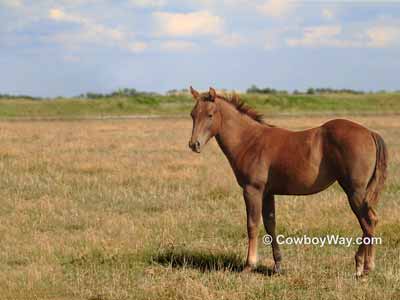
Below is a photo of a horse that was photographed around 6:00pm on a bright July day. At the location this photo was taken, this could easily have resulted in strong, harsh light.
However, the photographer waited for clouds to come over the sun and diffuse the light before taking the shot. Notice the horse is nicely lit, the grass and sky have a lot of natural color, and there aren't any distracting shadows on the horse or the ground.
Below: A horse photographed in beautiful natural light.

Midday can be a challenging time to photograph your horse. Midday light, assuming it's not diffused by clouds, often has an unpleasing effect that creates strong, brassy colors and blown-out highlights. It can also create harsh, unflattering shadows on your horse or elsewhere in the photo.
Good photos can be taken in the middle of the day, of course. However, they may require additional effort, such as finding light shade or waiting for a cloud to come over. They might also benefit from the use of fill-flash, deflectors, and more.
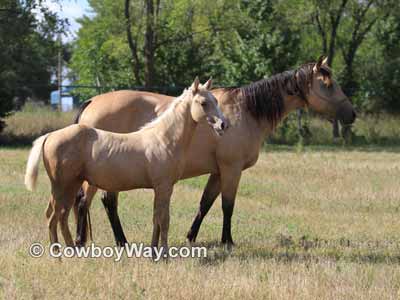
Below: A terrible photo! Taken in the harsh midday sun, the colt, his dam, and the surrounding landscape have lost all color and definition.
Golden Hour
Speaking of "The Light Should Be Right," there are two times of day photographers refer to as "golden hour:"
- The first hour after sunrise.
- The last hour before sunset.
The light during golden hour (both of them) is treasured by photographers. The light at this time tends to be soft with a beautiful color that flatters people, animals, skies, and landscapes.
Shooting photos during golden hour can make a photographer's job a lot easier. But, keep in mind, the sun moves quickly! Plan your golden hour sessions ahead of time. Otherwise, it's likely you'll lose the golden hour light a lot faster than you had planned for.
No Clutter
Make sure the background of the photo is clean and uncluttered (this includes shadows). Your horse should dominate the photograph, with little or nothing to distract the eye. Most often a "bland" background is a good background.
If your background is distracting, move the horse, change your angle, etc.
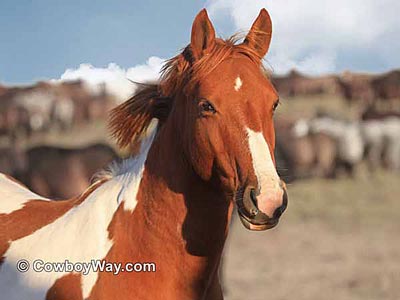
Below: The other horses in the background add a cluttered look to this photo.
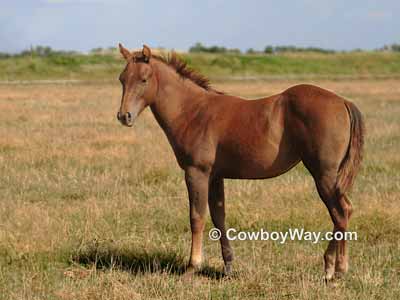
Below: In this photo the eye is drawn to the horse without being distracted by objects in the background.
Get Eye Level
There is a general rule of photography that says when you are photographing a live subject, make sure the camera is approximately level with their eyes. This helps make the photo look natural and more pleasing.
Fortunately, when photographing horses most people of average height are already at eye level with most horses of average height. That makes this guideline easy to follow.
However, when photographing short horses or ponies, or horses a lot taller than yourself, consider changing your position, or theirs, so you can photograph them at eye level.
For example, to get lower you can squat down. To get higher, you can use a step-stool. You can also place yourself, or the the horse or pony, on natural terrain that puts your camera on a level with their eye.
There are exceptions to this rule, of course:
- You many want to emphasize how small a miniature horse or pony is by shooting down at them.
- Conversely, you may want to emphasize how tall a certain horse is by shooting up at them.
In general, though, shooting a horse at their eye level is an excellent guideline for creating pleasing photos.
Below: An example of shooting eye level: The photographer got down low, level with the cat's eyes, for a more pleasing photo.
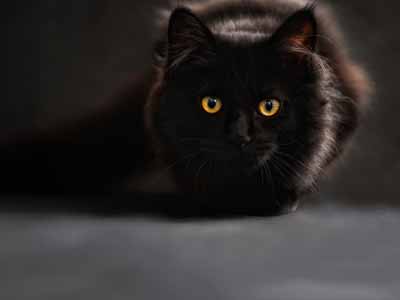
We would like to thank ClaudiaWollesen from Pixabay for the above image.
Focus On The Eyes
When composing a portrait photo of a horse or other living subject, focus on their eyes. There can be exceptions to this, but for the most part focusing on the eyes is important.
Why?
- When viewing photos the viewer is automatically drawn to look at the eyes.
- If the eyes of the main subject are out of focus, the overall beauty of the photo is diminished.
Almost all modern digital camera have "focus points" you can place in certain areas of your photo. Learn where the focus points are in your camera's settings, and how to put the the main focus point on one of your subject's eyes.
Action Photos Can Be An Exception
When taking photos of several horses at once, or action photos (for example, a barrel horse turning a barrel) this rule is much more difficult to follow if not impossible. However, it is a very important guideline for portrait photography.
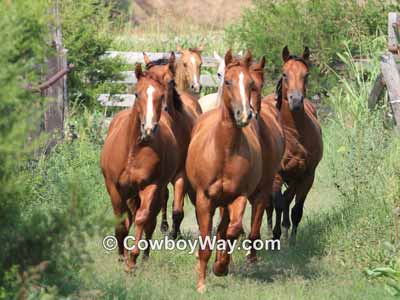
Below: Several horses galloping toward the camera. In this scenario it is difficult to pick just one horse and focus on their eyes.
Don't Hesitate!
If you see a good shot, take it! Don't hesitate! For most people hesitating is a common reaction because they want to wait to see if the contents of their photo are going to get even better.
Unfortunately, things often don't get better and frequently get worse. So, we repeat: If you see a good shot, take it!
For anyone using a digital camera hesitating should no longer be an excuse for blowing a photo. With a digital camera there is no concern about the cost of developing photos, so you can take a lot of photos without adding to your costs. You can then preview all of your photos and simply delete the ones that didn't work out.
Use The "Secret" Everyone Knows
One of the biggest "secrets" to taking excellent photos it to take lots of them. At the end of the day you simply keep the good ones and delete the others.
This is one of the biggest "secrets" used by professional photographers as well as serious amateurs.
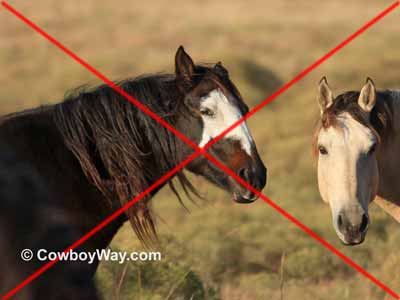
Below: This is a bad horse photo. The mare on the left made an unflattering face just before we snapped the shutter. She was also photo-bombed by the mare on the right (whom we could have edited out in post-processing if we had liked the photo).
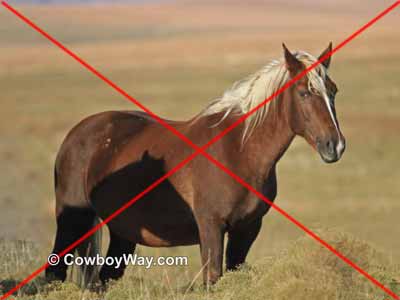
Below: Another bad horse photo. Once again the horse changed her facial expression just as we pressed the shutter. She also has a distracting horse-head shadow on her side from her nearby herd mates.
Digital Camera Software: The Two "Biggees" Of Editing Photos
If you own a digital camera there's a good chance some type of photo editing software came along with it. Most photo editing software, even the free and inexpensive versions, is surprisingly powerful and filled with all kinds of great editing choices for your photos.
Most of this software is so filled with features, in fact, that it can be overwhelming to the point that some folks don't have time to learn it all.
However, there are two features everyone should be comfortable with using in photo editing software: Cropping and cloning.
If you only learn these two features (both are easy) and ignore everything else the software can do, you will be able to transform many mediocre photos into good ones.
Cropping
Cropping - Cropping is where the edges of the photo (one or both sides, and/or the top or bottom), are cropped off. With cropping, distacting elements in the photo can simply be cropped off.
In addition, with cropping the main subject of the photo can be brought closer to the front, often making a huge difference in the quality of the photo.
For example, with cropping, this:
can become this:
Cloning
Cloning - Cloning is where one area of a photo is reproduced (or "cloned") over the top of another area.
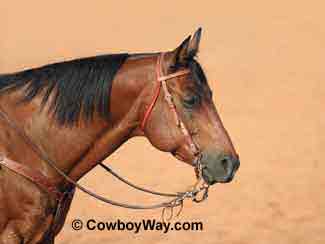
For example, with cloning, this......
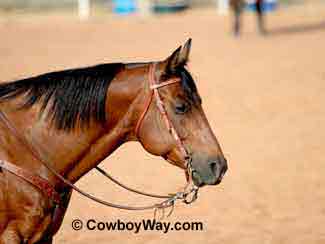
......can become this:
The cluttered background above the horse's head is gone. Dirt from other parts of the arena was cloned over the top of the clutter.
How To...
… Care For Your Felt Cowboy Hat
… Care For Your Saddle Pad Or Blanket
… Close A Gate With A Chain Latch
… Estimate Cattle Age By Their Teeth
… Fishtail Braid Your Horse's Tail
… Make A Bridle Rack Out Of Tin Cans
… Make A Collapsible Wood Saddle Rack
… Make A Flag Boot Out Of A Horn
… Make Homemade Hoof Conditioner
… Make Homemade Horse Fly Spray
… Measure A Western Saddle Seat
… Put A Horn Knot On Your Rope
… Put A Speed Burner On A Honda
… Recognize Common Horse Colors
… Recognize Common Horse Face Markings
… Stop A Saddle From Squeaking
… Tell A Boy Cow From A Girl Cow
… Tell A Horse Skull From A Cow Skull
… Tie A Stopper Knot
Tie a stopper knot for the end of a rope, or a metal, rawhide, or plastic honda
… Tie A Stopper Knot For A Honda
Tie a stopper knot for a tied honda
… Understand Leather / Hide Thickness
… Weigh A Horse and Optimize Rider Weight
… Wrap A Saddle Horn With Rubber
You Might Also Like...